Last Updated on October 9, 2022
A speaker is an indispensable element in producing audible sound from any device. There are scanty things more frustrating than a defective speaker system. If your speakers have gone bad, then you need to be prudent enough to solve that issue as easily as possible. The audio machine is like the heart of the entire vehicle system.
A digital multimeter is the best thing that can give you support in such a grim situation. It can easily check the multimeter in a matter of moments.
But applying such a complex electrical device is a mammoth task for some users. So to fully fill that aspect in this article, we will discuss the precise ways to test a blown speaker with the help of a digital multimeter and also depict some more mere ways to test the Speaker.
What are the symptoms of a bad speaker?
There are tons of clear symptoms of a bad speaker. You can easily detect the bad Speaker; if you know the symptoms, it will be easy for you to induce the repairing works. Let me tell you some secrets of a defective speaker. And they can go through a completely mute position. A poor playback module is the biggest symptom of a bad speaker. The audio might not be clear and can extinguish hissing or scraping noises.
The visual condition of the Speaker can be shattered as well as it can gather some rots and defects also. You can seek help from the battery or multimeter to check the playback quality. If you are a DIY enthusiast, check the Speaker’s diagnosing manual.
How to check the Speaker with a multimeter?
The mechanism of examining a bad speaker with a multimeter is the most enticing and lenient measure of all time.
STEP-1
A multimeter alone is more than enough to detect the faults in the Speaker. In the meantime, the first thing to do is to connect the multimeter with the speaker’s main two portfolios. 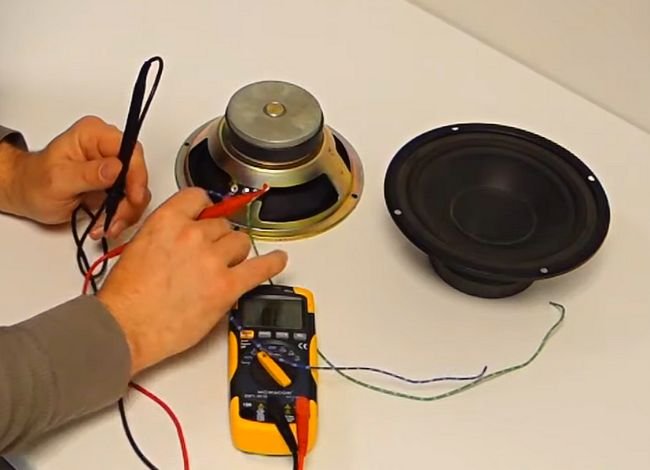
The first thing is always to set the multimeter to ohms. Then you need to check the resistance between the terminals, and the one thing left is checking the speaker outputs. The two probes can emanate the main readings of the impedance. Then check the amplifier to see if a sufficient signal is trespassing through it. The resistance readings are very much crucial for the speakers.
STEP-2
In this phase, you need to appoint the multimeter probes with the round terminals of the Speaker. For better results, attach the probes to the inner section of the Speaker. The terminals are near the world transactions as the wires are the main medium of passing the current as well as the signals. Make sure that you have connected the proper wire with the terminals. The negative and positive terminals are coiled in two different shades, black and red, or any other combination may also be prominent.
You need to attach the black multimeter probe to the negative terminal and the red multimeter probe to the positive terminal. After that, you must be getting some sort of reading, whether it is a decimal or a huge value that depends on the condition of the Speaker.
STEP-3
When you have attached the probes with the terminals, you could have seen some reading measurements in the multimeter’s display. The knobs must be in the position of the volatile check when you are checking the violating of the Speaker. And turn the knob at the resistance position when you want to check the resistance of the Speaker. Thus there are many options available in the multimeter and just rotate the knob to the position that you want to check the price is almost the same for each and every checking.
STEP-4
When you want to check for electrical resistance, then dial the resistance button and carry on the process. If you see a null reading in the multimeter’s display, then there is something wrong with the Speaker, or it is not getting the connection with the Speaker. 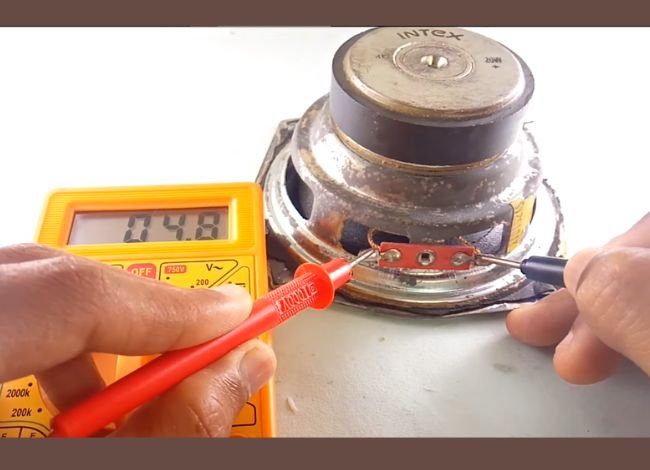
A zero electrical resistance denotes that the coil must have been damaged, or it may have been distorted from its actual place. If you want to measure the ohms of a subwoofer, then detach the subwoofer from its main power source. Then Disconnect the reversible audio input from the distinct subwoofer. The main power source of the subwoofer is the external amplifier.
Then Connect the probes to the multimeter and dial the unit in the ohms. Attach the probes like in the previous stage. The total amount of resistance should denote the correct resistance. Thus you can compare the reading value with the values that are given in the manual. Finally, replace and repair the Speaker if needed; thus, you put a nail in the coffin of the whole process.
What are the alternative ways of testing the speaker (Without a multimeter)?
There are many alternatives to examining the Speaker rather than the multimeter. Here I am depicting some of the brilliant ideas of testing the Speaker apart from the multimeter. These alternatives are so effective in making the Speaker back to the business. The thing that is common in the main conservatives is the testing process. Below I am depicting some of the outstanding ideas of examining the Speaker. Let us process into the system,
Applying a 9-VOLT BATTERY
The very first and foremost effective method of checking a speaker is taking the help of a 9-volt battery. This battery works as a supporting element for testing the Speaker. Here we will discuss the whole process of checking the Speaker with this durable battery.
- In the very first stage, Remove the wires from the amplifier. Then arrange a digital 9-volt battery and attach that with the Speaker’s two terminals. In some cases, the battery won’t fit the terminals. Then it would be best if you unscrewed the Speaker from the main holder.
- Then remove the wires that are situated inside the Speaker. When you are performing the process, a sound from the Speaker might hit your ear. Check the signals of the speakers in this case.
- They examine the Speaker. The speaker cover must be removed in order to recheck the wirings and circuits. Attach the wires to a 9-volt battery with the terminals of the Speaker. In this stage, you need a multimeter tester that can measure ohms and voltages simultaneously. An ohmmeter can also serve an identical purpose.
- Then, examine the ohms of the multimeter. When you are checking the ohms, be sure that the Speaker is deactivated or in an idling mode.
- If you have seen a 1.0 ohm reading on display, then Speaker is all okay, but if you see a null value, then there might be a blown circuit in the Speaker. If the device shows an infinite ohm, then it is out of order. By following these steps, you can check the Speaker with the battery.
Manually Checking the Speaker
Suppose you don’t have any device or electric tools and you are facing serious damage from the speakers. Then what shall you do? There is no other choice but to perform the task manually. You can effortlessly check the multimeter manually. Here are the full prices.
The first stage you can do is to check the manual of the Speaker. Identify the parts of the Speaker and then start the process. Run some rapid manual tests with a sound check method by playing some of the bass-boosted songs, and this is a prevalent process of checking a speaker’s feasibility. Test your speakers by turning on high-boosted melodies.
If the speakers are blown, then it will exacerbate some irregular issues. If your speakers are erecting sounds like it is distorted, then check the manuals on solving this issue. Perform a quick inspection test. First, check the scraping sound that has been coming out from the diaphragm or voice coil.
Address the Hissing, crackling, or any sort of rattling sounds. Try to find the source from where it is coming. Irregular bass movement and erratic rhythm can harm the diaphragm voice coil. Loose or broken connections in the cables might disrupt the whole thing. If you see physical damage to any parts, then repair or change that portion. If you do not detect the actual problem manually, then there is no other choice but to imply a multimeter. You can also use the battery method to solve the issue. Unique cover of the solar and see if there is any sign of a short circuit or burning. If that is the case, then you can manually change the wires. That may solve the issue.
Things you need to know about the speaker
Speakers are remarkable discoveries of modern science. It is needless to describe the importance and usefulness of the Speakers as they are the envoy of different types of sounds from a device. The system will collapse if the Speaker has gone out of the dogs. Unsurprisingly, that seems extremely unlikely to happen.
Surprisingly, the Speakers are experienced transducers capable of converting the intermittent electromagnetic waves into tremendous sound waves. The analog speakers are something different that can possibly convert the waves into the analog or digital form. This applies in the case where there is only one type of waveform. The speakers harmoniously work with the amplification system of the device.
The working mechanism goes directly like a correspondent of the audio system on behalf of the attached device. There is another attribute that subpoenas the audio receiver. The amplifier signalizes a rigid and robust sound set and also exaggerates the entire sequence. Whatever the terms of conditions for the analog form, it always makes a rebonding with the digital converters.
There is a magnet, an iron coil, a housing, and a cone. And a bunch of exaggerating robust electrical signals and all these make the full set of Speakers module. The Speaker takes all the electrical input somehow from the forthcoming tribunal aspects. On the contrary, The vibration out of the cone vehemently produces sound effects, and then you can abruptly hear that motion sound.
How does the speaker work?
The working mechanism of the Speaker is a very straightforward one. If you want to dig deep into the Speaker’s main theme of workability, then just check the description here. There are often two robust magnets that work really well in the outer circumstances. These two types are called fixed magnet and electromagnet. Actually, the main theme of the speakers lies within the magnetic turbulence.
The voice coil is another term of cognizance that makes the Speaker work pretty well. The company uses heat-resistant and durable materials to create the voice coil. It is actually encoded with a unique set of conductive wires. The entire settlement of the cone is accumulated with the interaction of the voice coil. The fixed magnetic invoice has been enthralling more than ever, and it always surrounds the voice coil. This is actually the main thing that has been in the form of signing off the component in the Speaker. The incessant diversity is the main symptom of being in culpable thoughts of impactful disabilities.
Tremendous aspects of the Speaker:
Actually, the mechanism of what you are expecting from the Speaker is to make some exceptional alliance. The positive charge of the electromagnet always carries the overwhelmed sound effect. The fixed magnet denotes the irrespective evaluability of the Speaker so that it can provide regular transmission of sounds to the user’s end.
Mechanical energy is one of the biggest and craziest circumstances that can handle the sound pressure level. The direction of the electrical current changes frequently as the voice-coil system can elucidate the rationalism of the electromagnet.
The air-pressure waves are mainly the prime criteria for successful combustion of the insulating system. Actually, the current flows through the magnetic field that cohesively makes decisive bondings with the coil of wire. A permanent magnet is attached to the Speaker and repels the voice coil and the musical waveform. To conclude, the permanent magnet is actually the driver of the indecent system of the Speaker.
Ending Notes
Speakers are such a necessary element for any device that is operated to emanate a huge buck of audible sounds. In the meantime, there are so many perfect ways to rest a speaker, and applying a multimeter for that purpose is the most satisfying thing to do. Now let the Speaker be in the same identical position and then introduce even excruciating a multimeter. The multimeter is capable of denoting more in-depth and accurate results. On the contrary, the battery test is a faster option to execute.
If you want to determine the Speaker’s power signal, you can turn on any audio player to identify whether the Speaker is workable. If your ear doesn’t catch the sound, then the Speaker must be changed to a more decent one. If you follow this amiable guideline, you will be able to examine the Speaker accurately.