Last Updated on April 6, 2026
The furnace is a decent and innovative technology for warming the home in the colder region. The Limit Switch is an invertible part of the furnace. Without that, the furnace cannot work. The Furnace Limit Switch sometimes faces indomitable problems like bad readings and faulty connector switches.
Then you need a device that can test the whole system and accurately tell the current’s readings of the resistance and voltage. That device is none other than the multimeter. It is the most trustable device that can detect issues in no time. This article will discuss the procedures for checking the furnace limit switch in a brief manner.
Best multimeter to check furnace limit switch– Klein MM600
What is a Furnace Limit Switch?
A limit switch is a part of a furnace, an electronic device responsible for maintaining a large consequence of official compendiums of the electrical combustion system. This Furnace Limit Switch can be damaged, or the readings, including the resistance and the current flowing reading, can see a fault. Then you need a multimeter to solve the issue in no time. This acts as a safety circuit inside the furnace system. The air that passes through the inside of the home can feel impending. The air is then made up warm by the compressor and the Limit Switch. Then the outer exit gate emanates warm air into the home, and thus your home remains warm during the cold season. When the temperature soars up, even if it crosses the upper limit, it turns off the heating element, thus skipping future damage.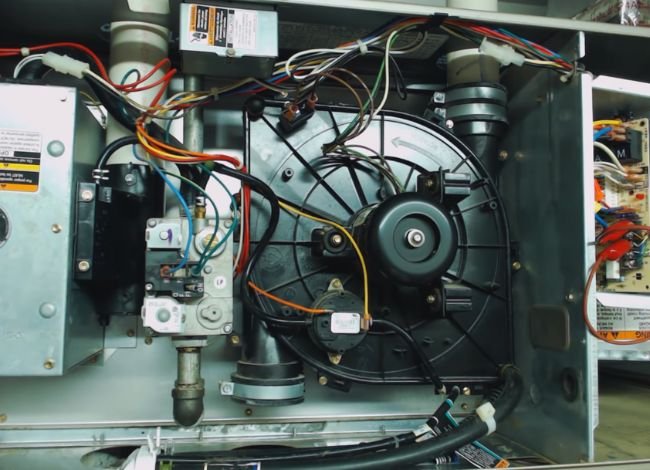
How does the Furnace Limit Switch work?
The Limit switches are deployed in furnaces so that they can detect the fluctuation of temperature limit. If the internal system sneaks that the temperature crosses the limit, it activates the furnace’s heaters. If you want to trigger the internal part of the casing and exaggerate the flow of the greater inside the home, then you need to fix the limit switches. And for that, the multimeters can help you much more easily. The entire furnace system will collapse if there is an extreme overload or short circuit. So to get the readings from the multimeter, you need to be in a state that conceptualizes the mainframe structure of the furnace.
How to examine the furnace limit switch with a Digital Multimeter?
Examining the furnace limit switch with a digital Multimeter is not easy, and you need to maintain a hard line of consequences to solve the problem. There are so many methods of checking the furnace limit switch. Here we will try to depict the whole method in a structured method.
The first step is unplugging and deactivating the wire harness of the furnace. Not only is it perilous to diagnose energized electrical systems, but it can also destroy the internal system of the furnace.
METHOD-1
At the inception of the diagnosis system, locate the furnace limit switch. Then figure out if the circuit box is normally open or closed. If you do not find the circuit box, then seek help from the manual guide. You can search the information on the internet or the web, and you will be able to inherit those methods of examining the fuse and furnace limit switch. Always perform trial and error to get the maximum error-free result.
Step-1
At the very beginning, shut down the breaker panel. Then check the hot box and the access panel. After unplugging the furnace and locating the limit switches, then start the main process of finding the resistance and accuracy of the furnace switch limit. Low-limit sensors are situated beside the combustion blower. The high-limit sensors are the main source of heat in the furnace. Apply a screwdriver to remove the loose part of the loose screws. Using the resistance method, you can easily apply the multimeter to the ohm menu. Then you must turn off the main power switches. Then dig deeper and remove the lead wires. The metal tabs that are located on every side of the switch need to be attached to the wires. The alligator clips can be effective enough to connect easily to the tabs. Then apply the red probe in one portion and use the red probe to attach it to another side. That’s how you can get the values of voltage.
Step-2
Touching each probe with the two different sides can inject some readout changes. The circuit is normally open in some cases, but if you see it at a closed state, then the induced motor must be activated. The connectivity through the posts of the probes is the most crucial point of the entire process. If the switch is damaged, then the current cannot pass through the wires. If you find a reading of .2 ohms or higher, it detects that contacts are closed, but the other channel is still on.
Remove and disconnect switches in the first hour if you intend to diagnose voltage using the multimeter. Then identify the common wire and recheck the voltage setting. The pressure switch and the thermal limit of the furnace start to roll out the switch flame at different connections. The console activation of the furnace system is connected with the multimeter to the ground. Finally, touch the probe on both sides of the switch and recheck the resistance of the furnace limit switch. The voltage reading on one terminal is exactly the same as on the other one.
Step-3
If the switch crosses these procedures, it is time to go deeper. The front metal disc is corrugated with the heat gun and lighter and attaches the probes on the posts.
When the switch is heated at an extreme level, a sound comes out of it. Then the multimeter displays the opposite reading from the switch. In these stages, the probes’ culmination is very much crucial, and the instinct of the terminals may erupt the readings at any time.
There are two terminals, as we know, in the furnace. The ground switch can feel the effect when it reaches through the circuits. Terminal A and terminal B are related to each other in a cohesive manner. The exact thing happens in both terminals. So if you got the reading of one terminal, then the other one must be the same. The probes on the ground must be circumspect of the actual reading. You need to put one after the other probe on a terminal to have the actual multimeter reading. The calculative measures of the terminals will be zero volts if it is not connected effectively.
Step-4
In this section, set the multimeter at the voltage setting. The relation of the inducer motor is totally opposite to the pressure switch. That means if the inducer motor is on, the pressure switch is off. Place one portion of the probe on one terminal and detect if the initial ohm is alright. A 24v as potential difference might be concentrated in the meter display.
If the switch is closed, then the inducer motor is activated. The potential voltage of the switch is near zero if it is not connected proportionally. The potential difference between the two stations will not be more than 0.2 volts. A column manometer can identify the pressure and a digital thermometer for temperature readings.
Step-5
The inducer motor needs a brilliant check in the last stage. The temperature or pressure affecting the switch might be noted for further safety. The other inducer motor might be closed if the temperature makes the switch open. This works brilliantly when the switch is open. Another prospect is that if the inducer motor is still open, the switch might be turned off.
You can use your furnace limit switch tester instead of the multimeter in case you can not arrange a multimeter. But in most cases, the multimeter works more efficiently than a tester. The multimeter is capable of calculating the internal combustion engine burnout examination.
When the furnace is in an open stage, then put the probes and test the voltage passing through the system. Then compare the readings with the standard value that you can find in the manual of the furnace. Finally, focus on the main thermostat if the entire process collapses.
DIFFERENT STATUS OF THE FURNACE
There are two modes of the furnace. One is the open mode, and the other is the closed mode. So how can you understand which mode detects what? Let me disclose the secret.
Automated Closed mode: If the furnace is heated, then the switch will open automatically, and there is no connectivity with the power system.
Normally Opened mode: If the furnace is heated, then the switch will close functionally, and you can detect similar connectivity with the system. If it does not work smoothly, the switch is defective and needs to be changed or replaced.
METHOD-2
The first method seems a lot more lengthy. So here I will give an alternative method of testing the Furnace Limit Switch. Let us have a look at that process,
Types of equipment for measuring the furnace readings
You may need some tools to test the Furnace Limit Switch. Here is the complete list of equipment,
- Screwdrivers and wrench
- Gloves and headlights
- Digital Multimeter
- Metal tabs
- Pressure switch hose
- Manual guide
Complete procedure:
To understand the method, we break apart these in some passages. Before continuing, the process, makes sure that you arrange all the tools.
Deactivate the main Power source
The very first chore you need to do is turn off the furnace’s power. Just turn off or disconnect the switch located at the furnace’s side. If you find no disconnect switch, then you need to dig deeper and dismantle the furnace’s breaker and the main circuit.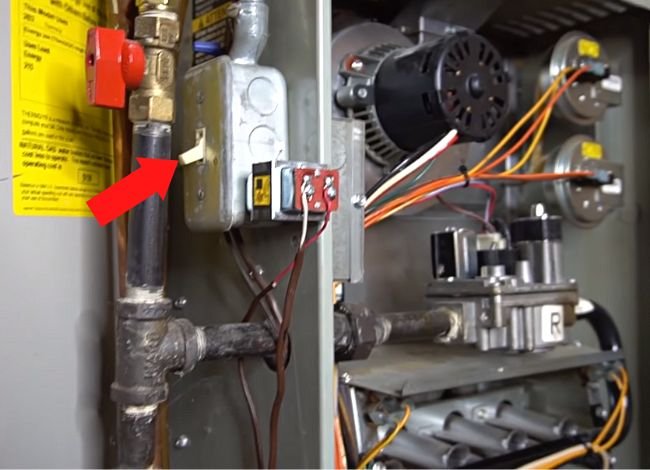
Pressure Switch Hose calibration is also really important. You may find a Pressure Switch Hose at the side of the main access panel. Diagnoses the hose and examines the pressure switch to see if it is connected to the even module. If the hose is jammed and broken, then repair and replace it.
Check the Hose nose pins
In this step, abnegate the pressure switch hose. The hose needs to be free, and if there are any obstructions, we solve that. Avoid blowing into a hose, or the pressure switch might be corroded. Then examine the Hose Port.
Inside the hose port, you may find some sort of obstruction. Eliminate those obstructions with a small plier or screwdriver. The switch body must be attached to the inlet. Finally, reshuffle the inlet hose. The furnace cover must also be cleared of debris, and then clean the hose vents with paper or cloth. The Vent Blockage can erode and choke the whole process. If the furnace is a condensing minor type, then put a plastic pipe instead of the venting plywood.
Examine the Switch Resistance
In this step, detach the pressure wires that are connected to the switch. The switch terminals have rare and closed hearings. Bring the multimeter and Set it for resistance dial check and sweep the dial and bring that into the resistance check. Lock that and feel each tester probe. 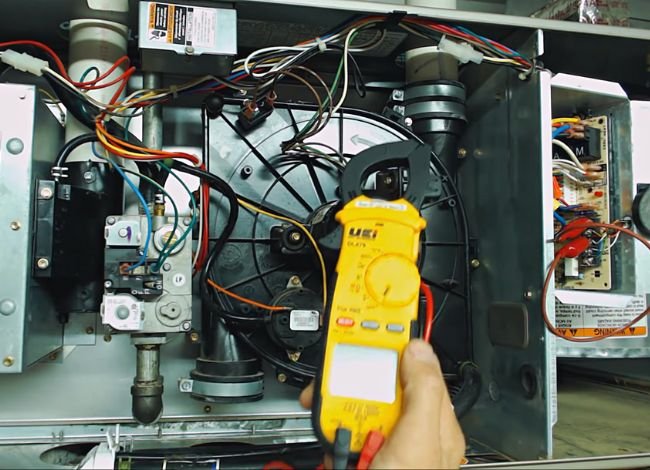
The tester may give a reading of 0 or near 0 as it has a higher potential of reading the no resistance mode. After you get the reading then, disconnect the probe with the terminals.
Check the final Furnace proceedings
Reinstate the wires to the pressure switch. Then check the manual furnace operation. Check the furnace access panel and see if power is passing through the furnace.
If the furnace is not responding, some defects are still left. In this regard, the multimeter can not help you, so go to a certified technician to inspect the whole furnace system. That’s how you can test the whole Limit Switch of the furnace.
Final Verdict
The process of testing a Limit Switch of the furnace is very confusing. You need to follow and maintain the sequence to get the job finally. A multimeter can be the best thing you can ever get to solve the furnace Limit Switch issue and diagnose thousands of chores related to the electrical regime. So use the multimeter wisely and have a decent run of the Limit Switch.
FAQs
- What is a furnace limit switch?
The furnace limit switch is a safety device that prevents overheating by controlling the blower fan and shutting off the furnace when necessary. - Why should I test a furnace limit switch?
Testing ensures the switch is functioning properly to prevent potential safety hazards and maintain optimal furnace performance. - How do I test a furnace limit switch with a multimeter?
Disconnect the switch, set the multimeter to continuity mode, and check for continuity across the terminals. - What indicates a faulty furnace limit switch?
A lack of continuity or incorrect resistance readings on the multimeter suggests the switch may be faulty. - Can I replace a furnace limit switch myself?
Yes, but ensure you follow safety precautions or consult a professional if unsure about the process.