Last Updated on October 13, 2022
Essential topics related to the golf cart motor:
- Battery motor
- Voltage reducer
- Solenoid valve
- Speed sensor
- Motor wiring diagram
- Single-phase motor winding
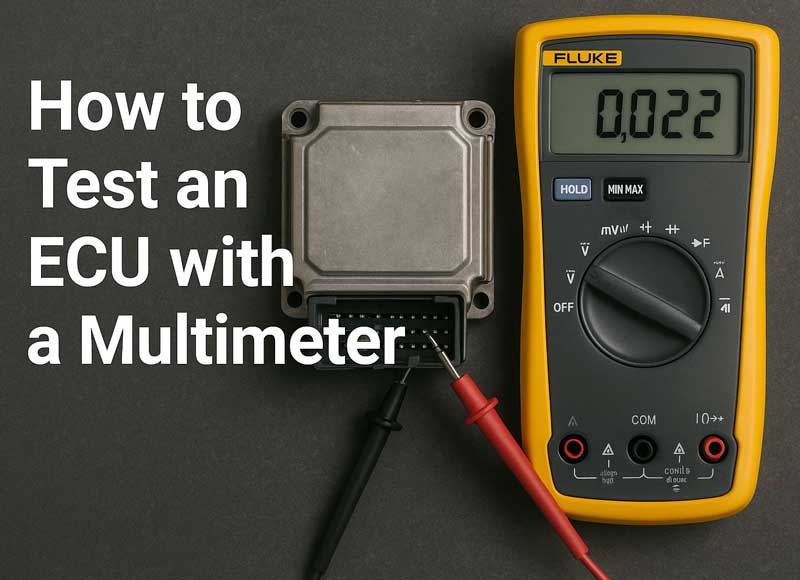
You may have become familiar with the multimeter after reading our previous articles. One truly fantastic thing is that a multimeter can detect almost all the issues in electrical devices, including the wirings, circuits, motors, chips, and many more.
While we are talking about a defective motor of a golf cart, the multimeter can be so much handy in these circumstances too. The motor is more or less like the electrical wirings that have two terminals. The specialty of a multimeter is that the diagnosis process is very simple and straightforward. This is as easy and time-saving as you just need to touch the probes to the motor’s terminals, and the multimeter itself will do the rest.
But you need to acknowledge the full process in a certified manner as the golf cart motor is not like the conventional motors. The alignment and the deployment of the electrical circuit and the insides are much more complex, and only a professional can handle that in a certified manner. This article will be helpful for all DIYers and mechanics as we will illustrate how to inspect and diagnose the golf cart motor with the help of a multimeter.
What is a golf cart motor?
Electric golf might not be an essential product, but it bears great significance to golfers. It is a type of light vehicle used to carry a golfer and his golfing materials from one place to another in the ground.
It works by sending energy from the main battery to the motor. The power bank receives the electric energy. Eventually, the motor activates the wheel and, in another form, the receiving part of the electric energy system. The clutch system initiates the transmission torque as well as the controlling system of the electric golf cart. The slipping of the torque may be so much decided that it can create severe malfunctions.
Another critical part of the golf cart is the solenoid. And it brings tremendous vigor to the system of the golf cart. The golf cart comprises a High-Speed Torque Club that has almost 36-volt or 48-volt Club Car power. The speed and torque more or less depending on the greater current flow as well as on the thermal capabilities. Suppose there is not sufficient current, then the efficiency slumps. Consequently, Series motors are more efficient than normal motors.
Less current drawing neutralizes better performance, which affects the long run time. So the larger the motor power, the more powerful and impactful the cart will be.
What are the exclusive parts of the golf cart motor?
The motor is a complex sequel to the golf cart. It has many parts inside it, and each of the parts is related to the others. You need to know about the exclusive golf cart motor parts so that in case of any discrepancies, you can identify them and solve them with ease. Here are the impulsive parts of the golf cart motor.
- Screw with Hex Caps
- Bumper in Drive Unit
- 48-Volt Motor Shunt-Wound
- Insulator Bushing and locknuts
- Bearing Retainer with Stator Shell Winding
- Bearing and Magnet kit
- Ball magnet Bearing, Frame, and Field Assembly
- Speed Sensor Assembly
- Sensor and Speed Connector
- End Shield Motor, Armature Motor
- Lubricant and lock washer
What are the possible symptoms of a bad golf cart motor?
Some rigorous symptoms can tell that the golf cart motor has gone bad. These symptoms are the pre-sign of a damaged golf cart motor. Let us take the floor to demonstrate the signs of a bad golf cart motor,
A bad motor always fumbles and cannot give backup for a long time. In some cases, it produces a rattling noise that becomes intolerable. This is because of the bad fuel that is used in the fuel chamber. If the cart runs on electricity, there must be electrical wiring and circuit damage. So check for the circuit system of the cart.
It is a common scenario that the burnout of the motor can cause poor traction, and the resistance faces excess calibration. There may be some sorts of worn brushes, damaged field coils, or rusty bearings that can make the motor sick and dull. In that case, you can uninstall and inspect the whole trajectory.
The inspection process of the motor is not very complex. You just need a screwdriver to expose the motor. You will find a red button that resides in between the main power supply and the main wiring. You need to push the button and check the condition of the charger. Hooking it up may eradicate all the issues.
A defective and rusty battery can make the whole energy consumption so insecure. A damaged battery is surely deadly for the whole cart. So charge and clean the battery. Inspect the motor to see if it is working in a decent way. If the motor is burned out, then the cart will not start.
In some cases, you may feel the temperature of the inner portion gets too high that it cannot bear the composition of the car. If it happens, remove the motor and check for the best and most unique tools to fix the issue.
A damaged solenoid can also be harmful to the cart. If the solenoid is defective, then the rotation of the solenoid may be hampered. A golf cart has several components, and if they are damaged,
The cracking of the motor housing or the armature may also vilify the condition of the golf cart. If any damage happens, then there is no option but to replace the motor. It is most probably better than trying to salvage the part.
How to figure out a bad golf cart solenoid?
A solenoid is a device that can turn electrical energy into mechanical energy. There is a coil of wire that can create electromagnet resistance. A magnetic field has been created that takes help from the electric current.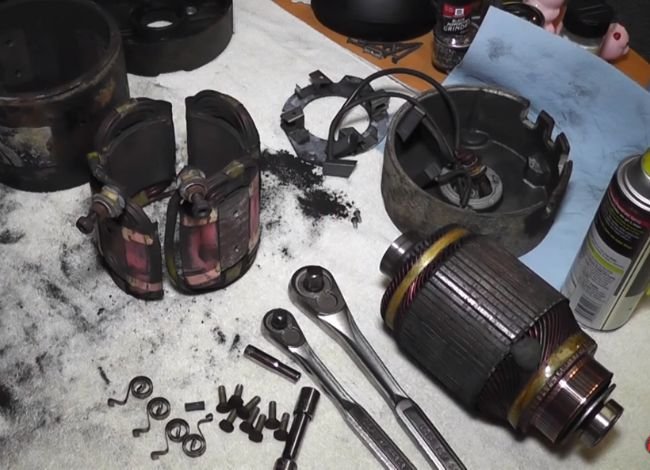
In a nutshell, a solenoid is a power switch that gives backup to the motor and battery of the golf cart. When you install the ignition key in the exact place, it clicks the solenoid that provides the motor with the required power. If the solenoid doesn’t click, then there might be a loose wire or a broken coil inside the cart. Extreme corrosion or erosion might be affecting the wiring and circuits.
When you are driving an electric golf cart, you might see some of the rare symptoms of a bad solenoid. A solenoid can face the golf cart’s failure to start the engine. While working with the ignition process, turn the accelerator process. It sends a signal to agitate the solenoid. But if it does not start, then your solenoid may be damaged. Overheating or high current flow can make the solenoid ill.
In some cases, the solenoid might not be delivering the necessary electricity to the ignition. So the cart cannot start itself. The controller also does not support the solenoid in activating the ignition switch. Loose connections or a weakened battery results in coil damage.
If you guess the solenoid is faulty, then take your cart to the mechanic or repair shop. The mechanic diagnoses the issue and repairs the solenoid if needed. The necessary steps must be taken in case there is something not happening alright with the golf cart.
How to check the golf cart motor windings?
The windings are generally regressive conductive wires that are covered with a magnetic core. They help the current to flow and emanate a magnetic field for rotating the motor. The motor winding is the electrical conductor that can generate a magnetic field. The core design accelerates the torque and also adjusts the electromagnetic force.
The process of checking the golf cart motor windings is not that complex. Just follow the chronological order, and you will be successful.
First, you ought to set the multimeter to the Ohms range. Then find all the motor terminals and make them the T1, T2, and T3 terminals. Apply the probes of the multimeter in these different terminals. You may have known that the black one should be touched with the negative, and the red probe must be attached to the positive terminal. Inspect all the T1, T2, and T3 terminals. The reading must be around .8 Ohms. The general range of the reading is between 0.3 to 2 ohms. If the reading is significantly more than 2 Ohms, then there is an open circuit.
The motor windings have a close relationship with the connector. There is also a coolant metering that can affect the windings. There could be some interference with the system and if it is too dry, apply a large figurative compendium with the motor.
Finally, inspect all the burn marks and check for any blackout that is causing a short circuit in the system. If the windings cable moves with the tracking module, then replace them.
What are the causes of a damaged golf cart motor?
There are many reasons for a damaged golf cart motor. All these factors make the motor sick. Let us acknowledge those reasons,
- A Damaged solenoid
- Defected battery standings
- Bad and loose potentiometer
- Burst motor settings
How to examine a 48 Volt Club Car Controller?
Testing your 48-volt club car controller is not that hard. First of all, charge the batteries to the full extent, and then the actual process will be initiated. There is some prerequisite of the charging standard requirement system.
A 48 Volt Club Car Controller is an essential part of the golf cart, and the thing that is common between the controller and the windings is that they are located at the insides and the location is somewhat in opposite directions. It is also possible to check the Club Car Controller with the multimeter, but you can use the voltmeter, also. While initiating the process, be sure that you start with the battery 1 and 2.
Set the multimeter in the ohm settings. You may have found more or less than six 8v batteries that accumulate the total 48-volt cart. It is the optimal performance of any of the motor systems.
If any of the batteries give a reading below seven volts, it will mismanage the system. It should meet the standard tolerable limit. The batteries will probably go bad if it does not comply with the system. Then a replacement is badly needed.
The hydrometer test is very much effective in measuring the 48-volt club car controller. While performing the procedure, put on gloves and put on safety glasses. Inspect each and every battery, then introduce the hydrometer for further conclusion. If the readings of the battery check exceed the standard value, then you will replace the battery and the Club Car Controller.
How to check a 48-volt golf cart motor with a multimeter?
After all these discussions, the time has come to elaborate on the process of checking the 48-volt golf cart motor with a multimeter. For the convenience of the readers, the entire process has been described in some steps or phases. So let’s dig deep into the discussion and see the entire testing process,
Step 1 – Figure out Power Source
The very first step is to set the multimeter in an ohm reading. Then the most crucial thing is to inspect the source of the power. Inspect the wall socket that charges the cart. It would be extreme if you had a 120-volt tester. The probes must be so sturdy that they can charge from the socket. If the voltage reading is null, then restart the circuit breaker. Turn on the switch providing electricity to that socket and the surroundings.
Check the DCV settings. Plug in the multimeter to initiate this test. The direct current voltage section must be in a section that can affect so much interaction with the modular compendiums. For inspecting the electric motors, set the direct current voltage to 20v.
Resistance to the Ohms settings needs a broad sanctuary for performing the exact ambiance. When you turn the multimeter on, reset it to zero volts to have error-free readings. The most advanced fusion of the multimeter will automatically count to zero at the commencement of the process.
Step 2 – Inspect the Batteries
If the wall socket is working in a decent manner, then check for further battery problems. You may have found two sturdy clamps attached to the wire. Take a screwdriver and turn counterclockwise to dethrone the clamp slot. The next thing you need to do is to evaluate the voltage of the battery. Just touch each side of the cables and ensure the 12-volt tester works well. Check all the batteries to detect a malfunction in the system. Remove the clamps while you are checking the other batteries. If the tester detects less than 12 volts, then repair that. Replace the batteries if they are corrugated.
Then turn off the electric motor, also unplug the stems of the motor. You may find a lot of types of wires in the system, like the hot wires, the ground wires, and, of course, the neutral wires. A grounding probe and motor leads are always associated with each other. Electric motors have a widespread dimension of referendums.
Connect the two wires, I mean, to say, connect the red and the black wires with each other at the different probes. Press the dual probes to the positive and negative segments of the motor. The insisting on the culmination of the positive and negative probes is very much necessary for detecting the voltage of the cart motor.
You need to locate a ground screw attached to the frame’s metal part. Initiate the test probe to spot. The motor leads have a natural intention of being attached to the positive and negative wires.
Step 3 – take off the Motor Hood
Now the period has come to check the motor. The motor is located under a panel board, and the systems are pretty much connected to the back of the cart. Four screws make the panel indomitable. Take the screwdriver to open the cover. Then start the operation of the motor. Take the readout resistance value and inspect the highest resistance indication, and the metal probe is the most sensitive part of the system. To have an accurate reading, follow the process with extra care.
Step 4 – Detach the Wiring
It is time to detach the cables. The motor wiring and the circuit formation are labeled clearly, so it is very easy to initiate the process without having any issues. Detach all the wires and then check all the wires with the multimeter. Inspect the windings if they are short attached to the frame. An open fuse or damaged circuit breaker can be the most deceptive matter to be complied with.
Step 5 – Check the Terminals of the motor
Now the time comes to check the F1 terminal. Inspect if it is grounded to the motor frame. There are so many terminals, and inspect them all. F1, A1, A2, and F2 terminals are different in nature. So check them with the tester in a conclusive way.
Check the continuity of each terminal. The continuity may vary from the S1 to the A1 terminal. And also, the reading will be different for the F1 and A2 terminals. All the terminals must have some amount of continuity and resistance. Use the probes to initiate all these readings with the help of the multimeter.
Continuity tests are apparent for detecting the issues of the motor. Check the windings to see if it is blown or open. The single-phase involvement with the 3-phase motors is a common scenario. The values are greater than the windings operation values. If the values are too humongous, then this indicates issues.
If you cannot do the process with the multimeter, then ask for expert help.
How much is the repair cost of a golf cart motor?
A rebuilt golf cart motor can cost you between $400 to $500. On the contrary, a brand-new motor can cost between $500 and $1,000; the labor cost is another level.
The brake system in a golf cart has a lot of components. Replacement of the brake system can cost $100-$200.
For the convenience of the users, I will enlist a total repairing cost of different parts of the golf cart; Battery repairing needs $700-$2000. The Shocks and Clutch needs $500-$1400, and the Speed controller check can cost you between $500-$800. The solenoid repair needs $50-$100.
Ending notes
The golf cart motor is an essential part of the vehicle. Maintaining this is a great deal of visualization. A routine engine inspection is essential, and the motor needs proper attention. Routine diagnosis of the motor may save your repair costs.
Consequently, if you are facing issues with the cart motor, then check if the motor is operating correctly. Testing a golf cart motor has been outlined briefly.
If you diagnose the problem yourself, then it may save you from unnecessary waste of money. You just need to know the basics of the multimeter. The model of the golf cart is necessary for knowing the basics. Check the user manual for a vast knowledge of the parts. If you know how to replace the parts, then seek help from a professional. Following the guideline above, you can easily test the golf cart motor.